DIY renovation of traditional Japanese house ―― part5
三重県伊賀市の古民家をDIYでリノベーションしています。前回(「広いリビング・ダイニング計画 part4」)までに、劣化した床を取り除き、新しい床板(コンパネ)を張り終えています。今回は、この上からコンパネを張って床の強度を増そうと思います。同時に雨漏りで痛んで取っ払った天井の補修を始めました。
※ I am not very good at English, so I apologize in advance.
We are renovating an old Japanese style house in Iga city with DIY (By the way, Iga is a famous ninja city). I wrote in the last this blog that we removed the deteriorated floor and finished building a new board . Today we plan to increase the strength of the floor by putting another board on top of this. At the same time, we are going to start repairing the ceiling which was damaged due to leaks.
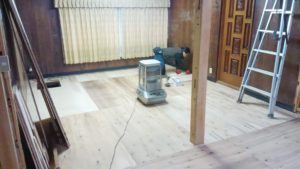
↓2枚目の床材(コンパネ)を張り始めました。
We started putting up the second layer boards.
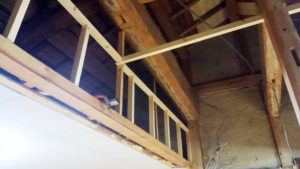
↓失われていた天井の骨組みの補修も始まりました。少し楽しい天井の形にしようと思っています。
We also began repairing the framework of the ceiling lost by leak.
しばらくの間は、こうした地味な風景が続きますが、意外に楽しい作業です。これからを楽しみにしていてください。
This kind of landscape will continue for a while, but it is surprisingly fun work for us. Please look forward to the future.
【 archive 】
◆ 広いリビング・ダイニング計画 part 4
◆ 広いリビング・ダイニング計画 part 3
◆ 広いリビング・ダイニング計画 part 2
◆ 広いリビング・ダイニング計画 part 1
棟梁かっちょええ!
ええ仕事してはりますね!
ありがとうございます!
ボチボチですが、なんとか進んでいます。
これからを楽しみにしていてください。